
SingleStore Notebooks

Note
This notebook can be run on a Free Starter Workspace. To create a Free Starter Workspace navigate to Start using the left nav. You can also use your existing Standard or Premium workspace with this Notebook.
Set the S3 object URI, bucket region, and AWS credentials below.
For permanent IAM credentials, leave SESSION_TOKEN = None.
For AWS SSO or other temporary credentials, provide the session token as well.
Do not share or commit AWS credentials, especially in a shared workspace.
REGION must match the S3 bucket's AWS Region.
In [1]:
1import json2
3URL = 's3://your-bucket/sample_data.csv'4REGION = 'your-s3-bucket-region'5
6ACCESS_KEY = 'your-access-key'7SECRET_ACCESS_KEY = 'your-secret-key'8
9# Leave as None for permanent IAM credentials.10# Set this for AWS SSO or other temporary credentials.11SESSION_TOKEN = None12
13credentials = {14    "aws_access_key_id": ACCESS_KEY,15    "aws_secret_access_key": SECRET_ACCESS_KEY,16}17
18if SESSION_TOKEN:19    credentials["aws_session_token"] = SESSION_TOKEN20
21CREDENTIALS_JSON = json.dumps(credentials)
This notebook demonstrates how to create a sample table in SingleStore, set up a pipeline to import data from an Amazon S3 bucket, and run queries on the imported data. It is designed for users who want to integrate S3 data with SingleStore and explore the capabilities of pipelines for efficient data ingestion.
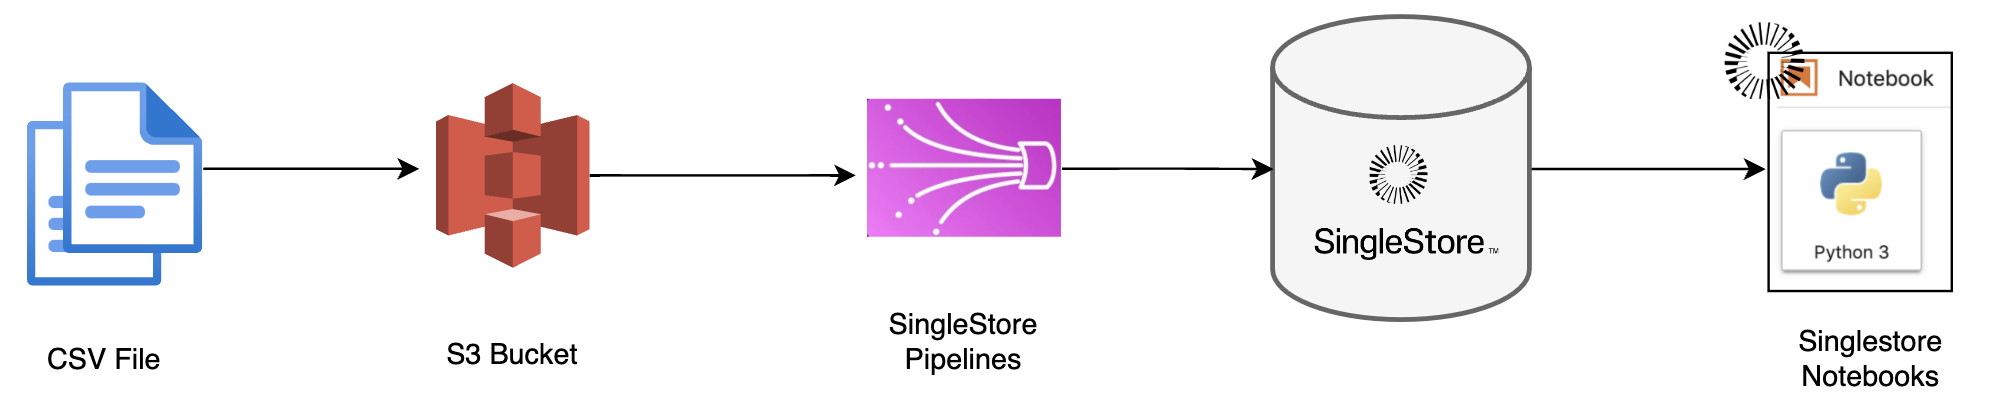
Start by creating a table that will hold the data imported from S3.
The CSV must:
Include this header exactly:
id,name,age,address,created_at
Contain five values in every data row.
Quote text fields that contain commas.
Include one header row.
Contain no blank lines at the end of the file.
Match the table schema below.
Example:
id,name,age,address,created_at
1,Alice,30,"123 Main St","2026-09-09 10:00:00"
2,Bob,35,"456 Oak Ave","2026-09-09 10:05:00"
In [2]:
1%%sql2# Feel free to change table name and schema3
4CREATE TABLE IF NOT EXISTS my_table (5    id INT,6    name VARCHAR(255),7    age INT,8    address TEXT,9    created_at TIMESTAMP10);
You'll need to create a pipeline that pulls data from an S3 bucket into this table. This example assumes you have a CSV file in your S3 bucket.
Ensure that: You have access to the S3 bucket. Proper IAM roles or access keys are configured in SingleStore. The CSV file has a structure that matches the table schema.
Using these identifiers and keys, execute the following statement.
In [3]:
1%%sql2CREATE PIPELINE s3_import_pipeline3AS LOAD DATA S3 '{{URL}}'4CONFIG '{"REGION":"{{REGION}}"}'5CREDENTIALS '{{CREDENTIALS_JSON}}'6INTO TABLE my_table7FIELDS TERMINATED BY ','8OPTIONALLY ENCLOSED BY '"'9LINES TERMINATED BY '\n'10IGNORE 1 LINES;
To start the pipeline and begin importing the data from the S3 bucket:
In [4]:
1%%sql2START PIPELINE s3_import_pipeline;
Once the data has been imported, you can run a query to select it:
In [5]:
1%%sql2SELECT * FROM my_table ORDER BY id;
In [6]:
1%%sql2SELECT count(*) FROM my_table
We have shown how to insert data from a Amazon S3 using Pipelines to SingleStoreDB. These techniques should enable you to
integrate your Amazon S3 with SingleStoreDB.
Remove the '#' to uncomment and execute the queries below to clean up the pipeline and table created.
In [7]:
1%%sql2#STOP PIPELINE s3_import_pipeline;3
4#DROP PIPELINE s3_import_pipeline;
In [8]:
1%%sql2#DROP TABLE my_table;

This notebook demonstrates how to create a sample table in SingleStore, set up a pipeline to import data from an Amazon S3 bucket.
This Notebook can be run in Shared Tier, Standard and Enterprise deployments.
Launch this notebook in SingleStore and start executing queries instantly.
This Notebook has been released under the Apache 2.0 open source license.